Before you attempt to install your wireless speakers, it is recommended that you take a look at our How Wireless Speakers Work article. Understanding how wireless speakers work is extremely helpful when moving on to the installation process. After you have read the above article, take a look at the following guide to help you install your wireless speakers.
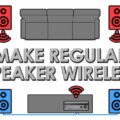
As outlined in the above article, How Wireless Speakers Work , the connection diagram for most wireless speaker setups is as follows:
Computer/ TV >>> Transmitter unit >>> RF Sound Waves >>> Main speaker (RF receiver)
The first thing you need to do is connect your transmitter unit to your audio source, which will likely be a TV or computer. This is accomplished by first plugging your RCA cable into your audio source. Make sure that the color of the RCA cables correspond to the colors of the audio output jacks on your audio source. Following this step, connect the other side of the RCA cable into your transmitter. Once your transmitter is connected to your audio source, you must ensure that your transmitter is powered. Connect your transmitter into a wall outlet or power plug using the AC adapter that you received with the unit.
The next thing to do is ensure that your wireless speakers are sufficiently powered. If your speakers are battery operated, install the correct battery type into them and make sure that the polarities match up with the diagram on the inside of the wireless speaker battery slot. Alternatively, if they are AC powered, connect AC adapters to the power jacks of the wireless speakers.
Now it’s time to ensure that the sound is coming out of your speakers the way you want it to. Most wireless speakers come with a switch that says “Left/Right/Mono”. This allows you to determine which speakers will receive the left sound signals and which will receive the right sound signals. Selecting mono will place both the left and right sound signals into the same speaker, which is not preferred by most people as it does not create the feeling of surround sound. Afterwards, position your speakers in the best suited positions in your setup. If you are using your wireless speakers to make a home theater, make sure to try out different positions until you get the best sound.
The final step is to turn on your transmitter and wireless speakers and ensure that they are working. To accomplish this, double-check the “Link Status” light on each speaker. If these lights are not lit green, hold down the “Pair” button on the back of the transmitter and speakers for a few seconds. This should fix any connectivity issues you may have and the power indicator lights should turn green.
Following the above steps in order will help you create a functional wireless speaker setup. If you are unhappy with the sound quality of your unit, try changing the positioning of your speakers. Take a look at our Wireless Home Theater Options article for more information on what products to purchase after installing your wireless speakers.


